Jizō figures

Google Earth Pro auf Fedora installieren

In dem Fedorablog, den ich ganz früher mal geschrieben hatte, hatte ich ein regelmäßig wiederkehrendes Thema: Die Installation von Google Earth. Lange Zeit war das echte Handarbeit, obwohl Google ein RPM-Paket bereitstellte.

Seitdem sind viele Jahre vergangen. Mittlerweile stellt Google die ehemals kostenpflichtige Pro-Version von Google Earth zum kostenlosen Download für Linux zur Verfügung. Und auch die Installation ist glücklicherweise kein Problem mehr. Es reicht schon, das RPM-Paket zu installieren:

sudo dnf install google-earth-pro-stable-current.x86_64.rpm

Auf deutschen und österreichischen Systemen¹ muss anschließend noch eine kleine manuelle Änderung vorgenommen werden. Der Grund dafür ist, dass die Google-Server bei der Ortssuche Geokoordinaten mit Dezimalpunkt ausliefern, das System aber das bei uns übliche Dezimalkomma erwartet und die Zahlen deshalb nicht verarbeiten kann. Die virtuelle Erdkugel dreht sich dann immer mitten auf den Atlantik statt auf die gewünschte Markierung.

Eine einfache Lösung ist, die Datei /opt/google/earth/pro/googleearth mit einem Texteditor zu bearbeiten (Root-Rechte erforderlich) und in der letzten Zeile der Datei ein LC_NUMERIC=us_US.UTF-8 einzufügen:

LD_LIBRARY_PATH=.:$LD_LIBRARY_PATH LC_NUMERIC=us_US.UTF-8 ./googleearth-bin "$@"

Danach sollte Google Earth Pro problemlos und stabil laufen.


¹) Nach meinen Recherchen verwendet ein Linux mit schweizerdeutscher Einstellung den Dezimalpunkt. Die Anpassung ist dann nicht nötig, schadet aber auch nicht.
CircuitPython and Fedora

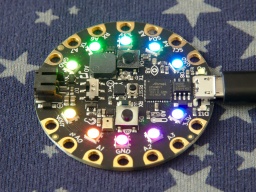
The season of long winter nights is coming, so I got myself an AdaFruit Circuit Playground Express for some home decoration.

My plan is to program it using CircuitPython, a MicroPython derivate that is adapted to the AdaFruit hardware.

CircuitPython must be installed to the Circuit Playground first, which turned out to be difficult with Fedora Linux in a first attempt. The troublemaker was the ModemManager, which is still installed by default. It detects the serial port of the AdaFruit device, and then hogs this resource because, well, it might be a modem. 🙄

My older readers certainly still remember what a modem is. 😉 But to make a long story short, almost no one is using a serial modem nowadays, so the ModemManager does not serve any useful purpose. However, it cannot be removed, because other important packages still depend on it. The only way is to stop it permanently:

sudo systemctl stop ModemManager
sudo systemctl disable ModemManager

After that, I could finally install CircuitPython to the Circuit Playground. First I downloaded the matching uf2 file. After that, I connected the Playground via USB, and changed to the bootloader mode by pressing its reset button twice (like a double-click).

The Circuit Playground is now mounted as an USB drive called CPLAYBOOT. All there is to do now is to copy the uf2 file to this drive. The Playground automatically reboots after that. If everything went fine, it will come back as an USB drive called CIRCUITPY.

The next step is to install the AdaFruit libraries to that drive. I downloaded the latest library bundle that matched my CircuitPython version, and just unpacked it to the CIRCUITPY drive.

That's it... All there is to do now, is to open the code.py file in an editor and change the code. It is immediately executed when it is saved.

For a start, there are a lot of code examples for the Circuit Playground Express on the AdaFruit web site.

Reviving a Sony CDP-991, Part 5

The player is playing again. Time for some final cleanings.

Fifth Problem: Crackling Volume Pot

The volume assembly with the pots on the left. Just spray into the hole. After the calibration part, this is going to be a walk in the park. Or so I thought.

On the CDP-991, the playback volume can be changed via remote control. There's a motor that actually drives the volume knob and the potentiometers. The custom file feature allows to store individual volume settings for different CDs.

Due to the construction with the pots and the motor, the volume control assembly is rather big and is mounted to the front panel with screws. I removed the screws and the volume knob, but still could not remove the assembly for cleaning. It was still fixed somewhere else. The service manual gave no hint about how to remove it.

So I just tried my luck and sprayed some contact cleaner into the holes of the three pots close to the front. It worked, and saved me from finding a way to remove the assembly.

And that's it... I closed the case and polished it with a microfiber cloth and a soft cleaner. Then I put batteries into the remote control.

Welcome back to the living room, my good old CD player! 😀

Retrospective

Looking back, I am surprised how much is still working and in a good shape after 27 years. I am also surprised that I could still get a good service manual, and all the necessary replacement parts.

For most parts of the restauration, I just needed a screwdriver, cotton buds, isopropanol, and grease. So basically it can be done by anyone who isn't all thumbs. Just the pickup replacement and the calibration needs more elaborate equipment.

Reviving a Sony CDP-991, Part 4

The CD player finally plays music again, but still has trouble with the higher tracks.

Fourth Problem: Worn out Laser

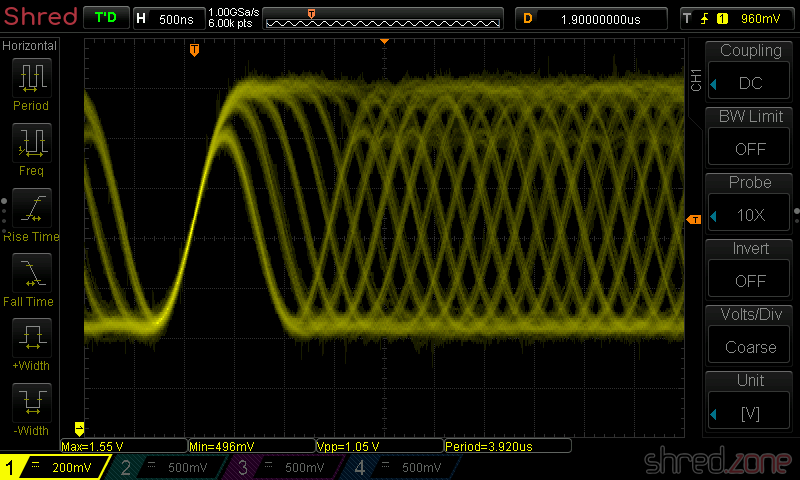
Let's find out how worn out the laser actually is. I soldered a wire to the RF test point and connected it to a scope.

The service manual recommends to use a special test CD, but you can use any CD for the RF test. I found out that older CDs gave better results, probably because modern production methods are cheaper and less reflective. Do not use CD-R, as these discs use a dye and are not as reflective as standard CDs.

According to the service manual, the signal should have an amplitude of about 1.2Vpp (+0.2V, -0.4V).

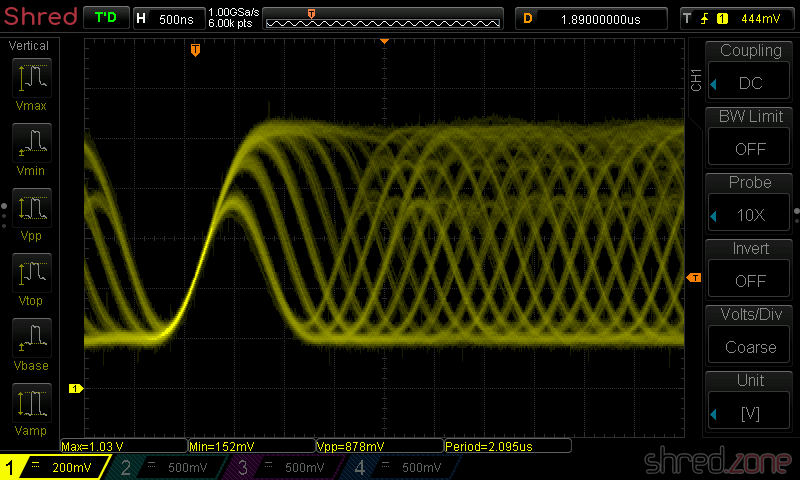
The actual amplitude is just above 600mVpp, far below the required minimum of 800mVpp.

The first thing one should try now is to clean the lens. I used a cotton bud and 100% isopropanol for that. After that, the amplitude was a little better with about 880mVpp, but still at the minimum.

I could now recalibrate the player and try to get the best out of it.

But honestly, a new optical pickup module for this player can be ordered at the Bay for less than €20. It's not genuine, since Sony is not producing the KSS-240A any more. But I am curious how good that remake actually is. If it should be worse, I could still continue to use the original one.

The optical pickup is very sensitive to static discharge. If you try the replacement at home, use an antistatic wrist strap and other ESD protective measures while handling it!

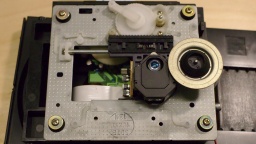
The replacement of the pickup was much easier than expected. Only a plastic clip is holding the metal shaft of the sled in place, so it could easily be pulled out. After that, I could remove the old pickup.

And while I was at it, I thoroughly cleaned the shaft and the plastic parts from the old grease again, and reapplied a bit of fresh silicone grease. I also applied a little bit of grease to the gears that are moving the sled.

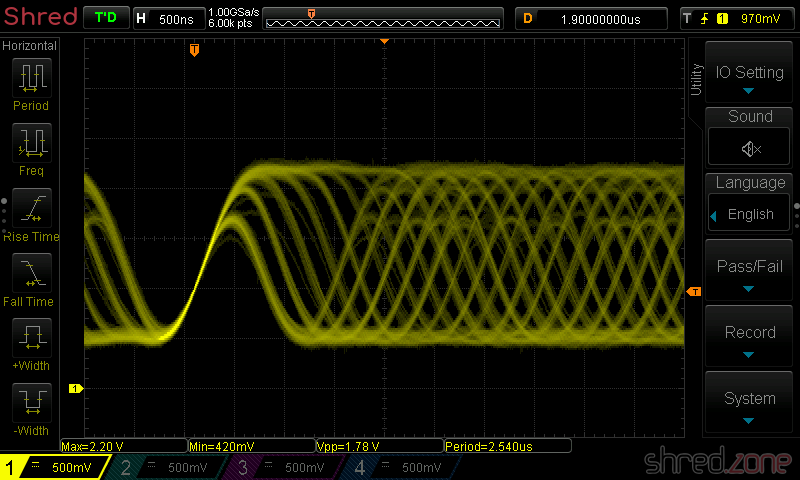
Then I inserted the new pickup and fixed it with the shaft. The first test with the new pickup brought good news, and bad news. The good news is that the replica pickup is working, and the RF amplitude is even above the 1.4Vpp upper limit now.

The bad news is that the drive was making a loud and awful whistling noise now. So I recalibrated the player as described in this restauration project of a similar player.

The calibration was successful. The whistling noise is gone (except on track changes), and the player plays all the tracks again. I am sure an experienced technician can calibrate it a lot better, but I'm happy with the result.

And thanks to my proper cleaning, the sled noises are also much better. By all means good enough considering the age of the player.

I'm almost done! There's just a tiny problem left: The crackling volume pot.

Reviving a Sony CDP-991, Part 3

In the last part, I made the tray operational. It's a precondition for this part: Inserting a CD.

Third Problem: Stuck Sled

In the opened tray, I put a random CD from my shelf. Then I pressed the close button. The tray closed, and a few seconds later, the player showed the number of tracks and total playback time. Yaaay! 🎉 The optical pickup seems to be working.

Daringly I pressed the play button, the disc started spinning, and then...

Nothing. No playback. Just silence.

I also noticed that the characteristical noise of the moving sled was missing when I changed through the tracks.

My first thought was that the laser was worn out after all. But then, on the other hand, the pickup would not have been able to read the CD's table of contents. It rather seems that the sled was stuck.

The optical deck with the pickup on the sled I disassembled the drive again. The pickup moves on a metal shaft and a plastic strip. Both were greased. I carefully removed the old lubrication with cotton buds and isopropanol, then applied a tiny bit of fresh silicone grease.

Next attempt... And this time, it was successful! After about 15 years, I heard music from my good old CD player again!

But I'm not done yet, as I already spotted some more problems. The player refuses to play higher track numbers, and the sled is still making strange noises on a track change. Also, the volume potentiometer crackles awfully and needs some cleaning. More of that in the next parts.